Capturing people
Add a person to your graph from pasted text, a card photo, voice, an upload, or by typing them in — pick the method from one list, then review the fields before saving.
Capture is one click from anywhere. A Capture button in the app nav opens the
capture dialog on every /app screen — the fastest path in. The same capture
lives behind the + in the middle of the phone's bottom bar, the Capture
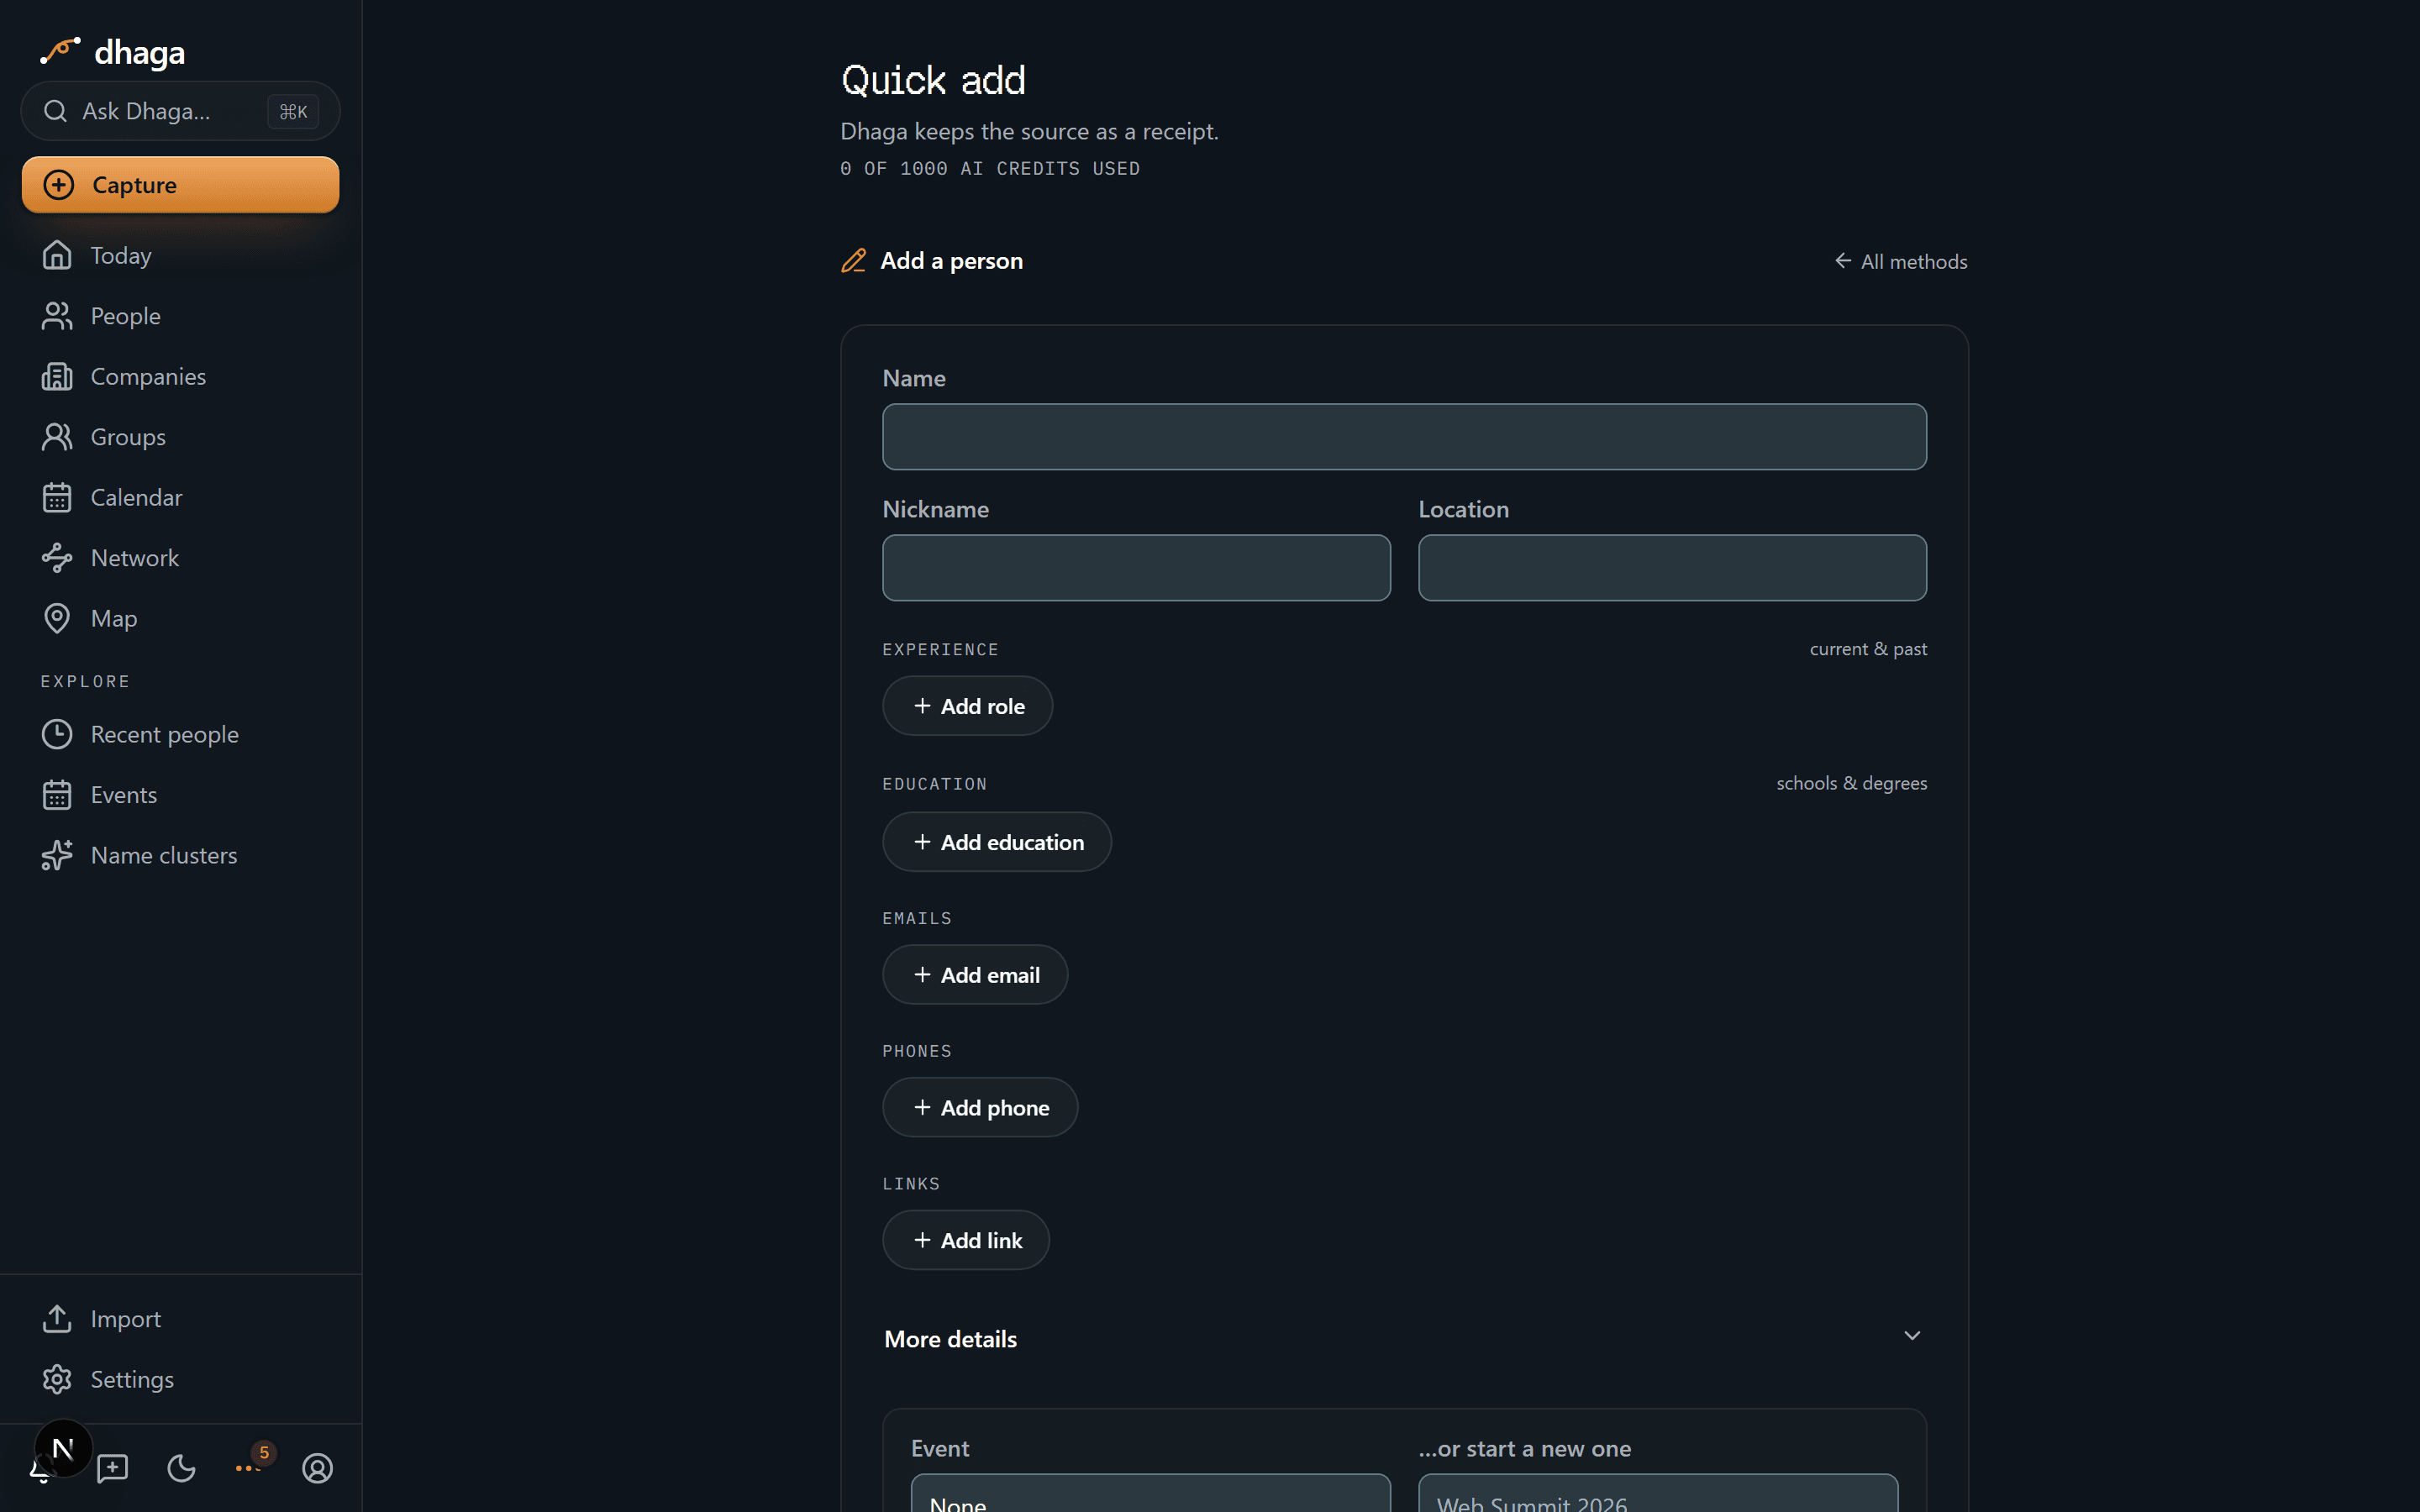
button on Home, and the dedicated /app/quick-add page, which additionally
lets you attach the new person to an existing event (below). All run the same
extraction, keep the original input as a receipt, and meter AI usage per
account. A card scan or a paste-to-contact costs 1 credit, and the free tier
includes 10 AI credits a month — ten card scans, say, or five scans and five
notes. Run out and the app stays fully usable for the methods that don't use AI.
See AI credits.
Pick how you're adding them
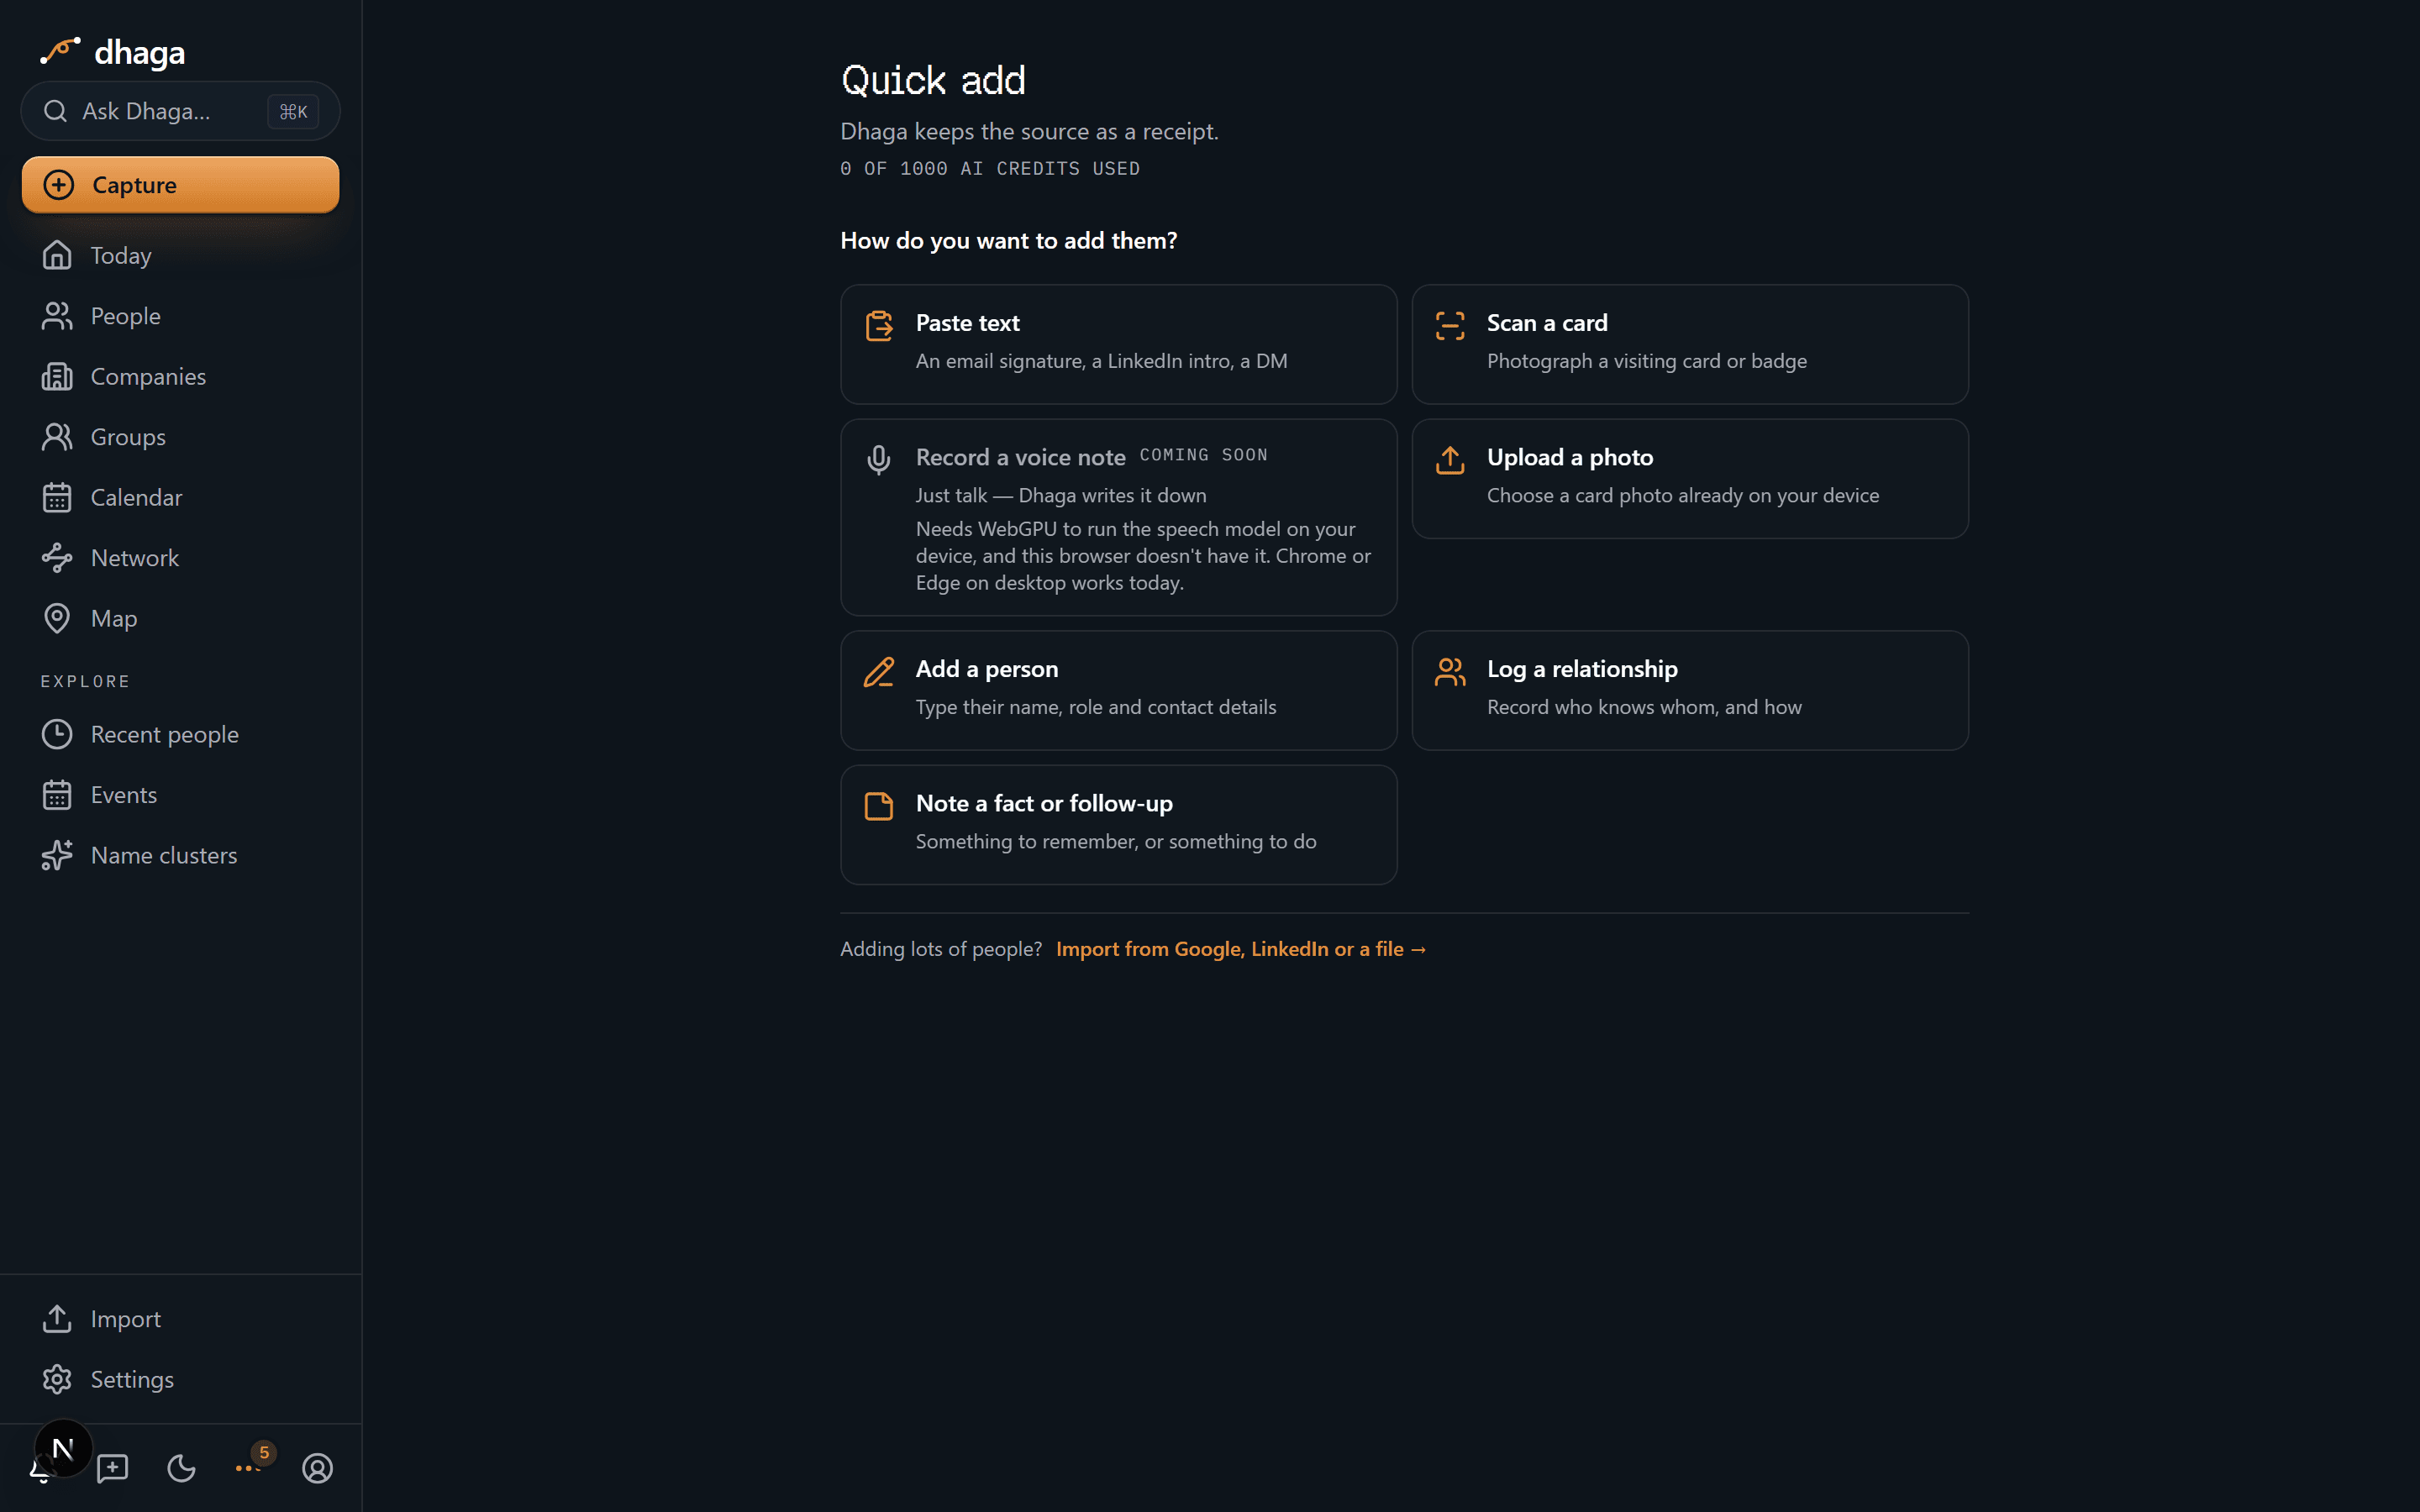
Every one of those entry points opens on the same question — "How do you want to add them?" — over a grid of all seven methods. There's no default surface and nothing hidden a level down: desktop, phone and the Home button all show the same list.
- Paste text — an email signature, a LinkedIn intro, a DM
- Scan a card — photograph a visiting card or badge
- Record a voice note — just talk; Dhaga writes it down
- Upload a photo — choose a card photo already on your device
- Add a person — type their name, role and contact details
- Log a relationship — record who knows whom, and how
- Note a fact or follow-up — something to remember, or something to do
Pick one and you land straight on it, with a ← All methods link in the header to come back and choose differently. The four AI methods (paste, scan, voice, upload) are marked Needs credits when your AI credits have run out — they stay clickable, and the surface itself explains the gate, so you're never guessing which of the seven still work. A method your browser can't run — voice without WebGPU — is greyed out with a Coming soon note instead.
Under the grid, a quiet line reads Adding lots of people? with a link to Import from Google, LinkedIn or a file. That's the answer to a different question — a whole address book rather than one person — so it sits below the seven rather than competing with them. See Importing contacts.
The methods that don't use AI — Add a person, Log a relationship, Note a fact or follow-up — keep working when you're out of credits, or on a deployment with no AI provider configured.
What each method does
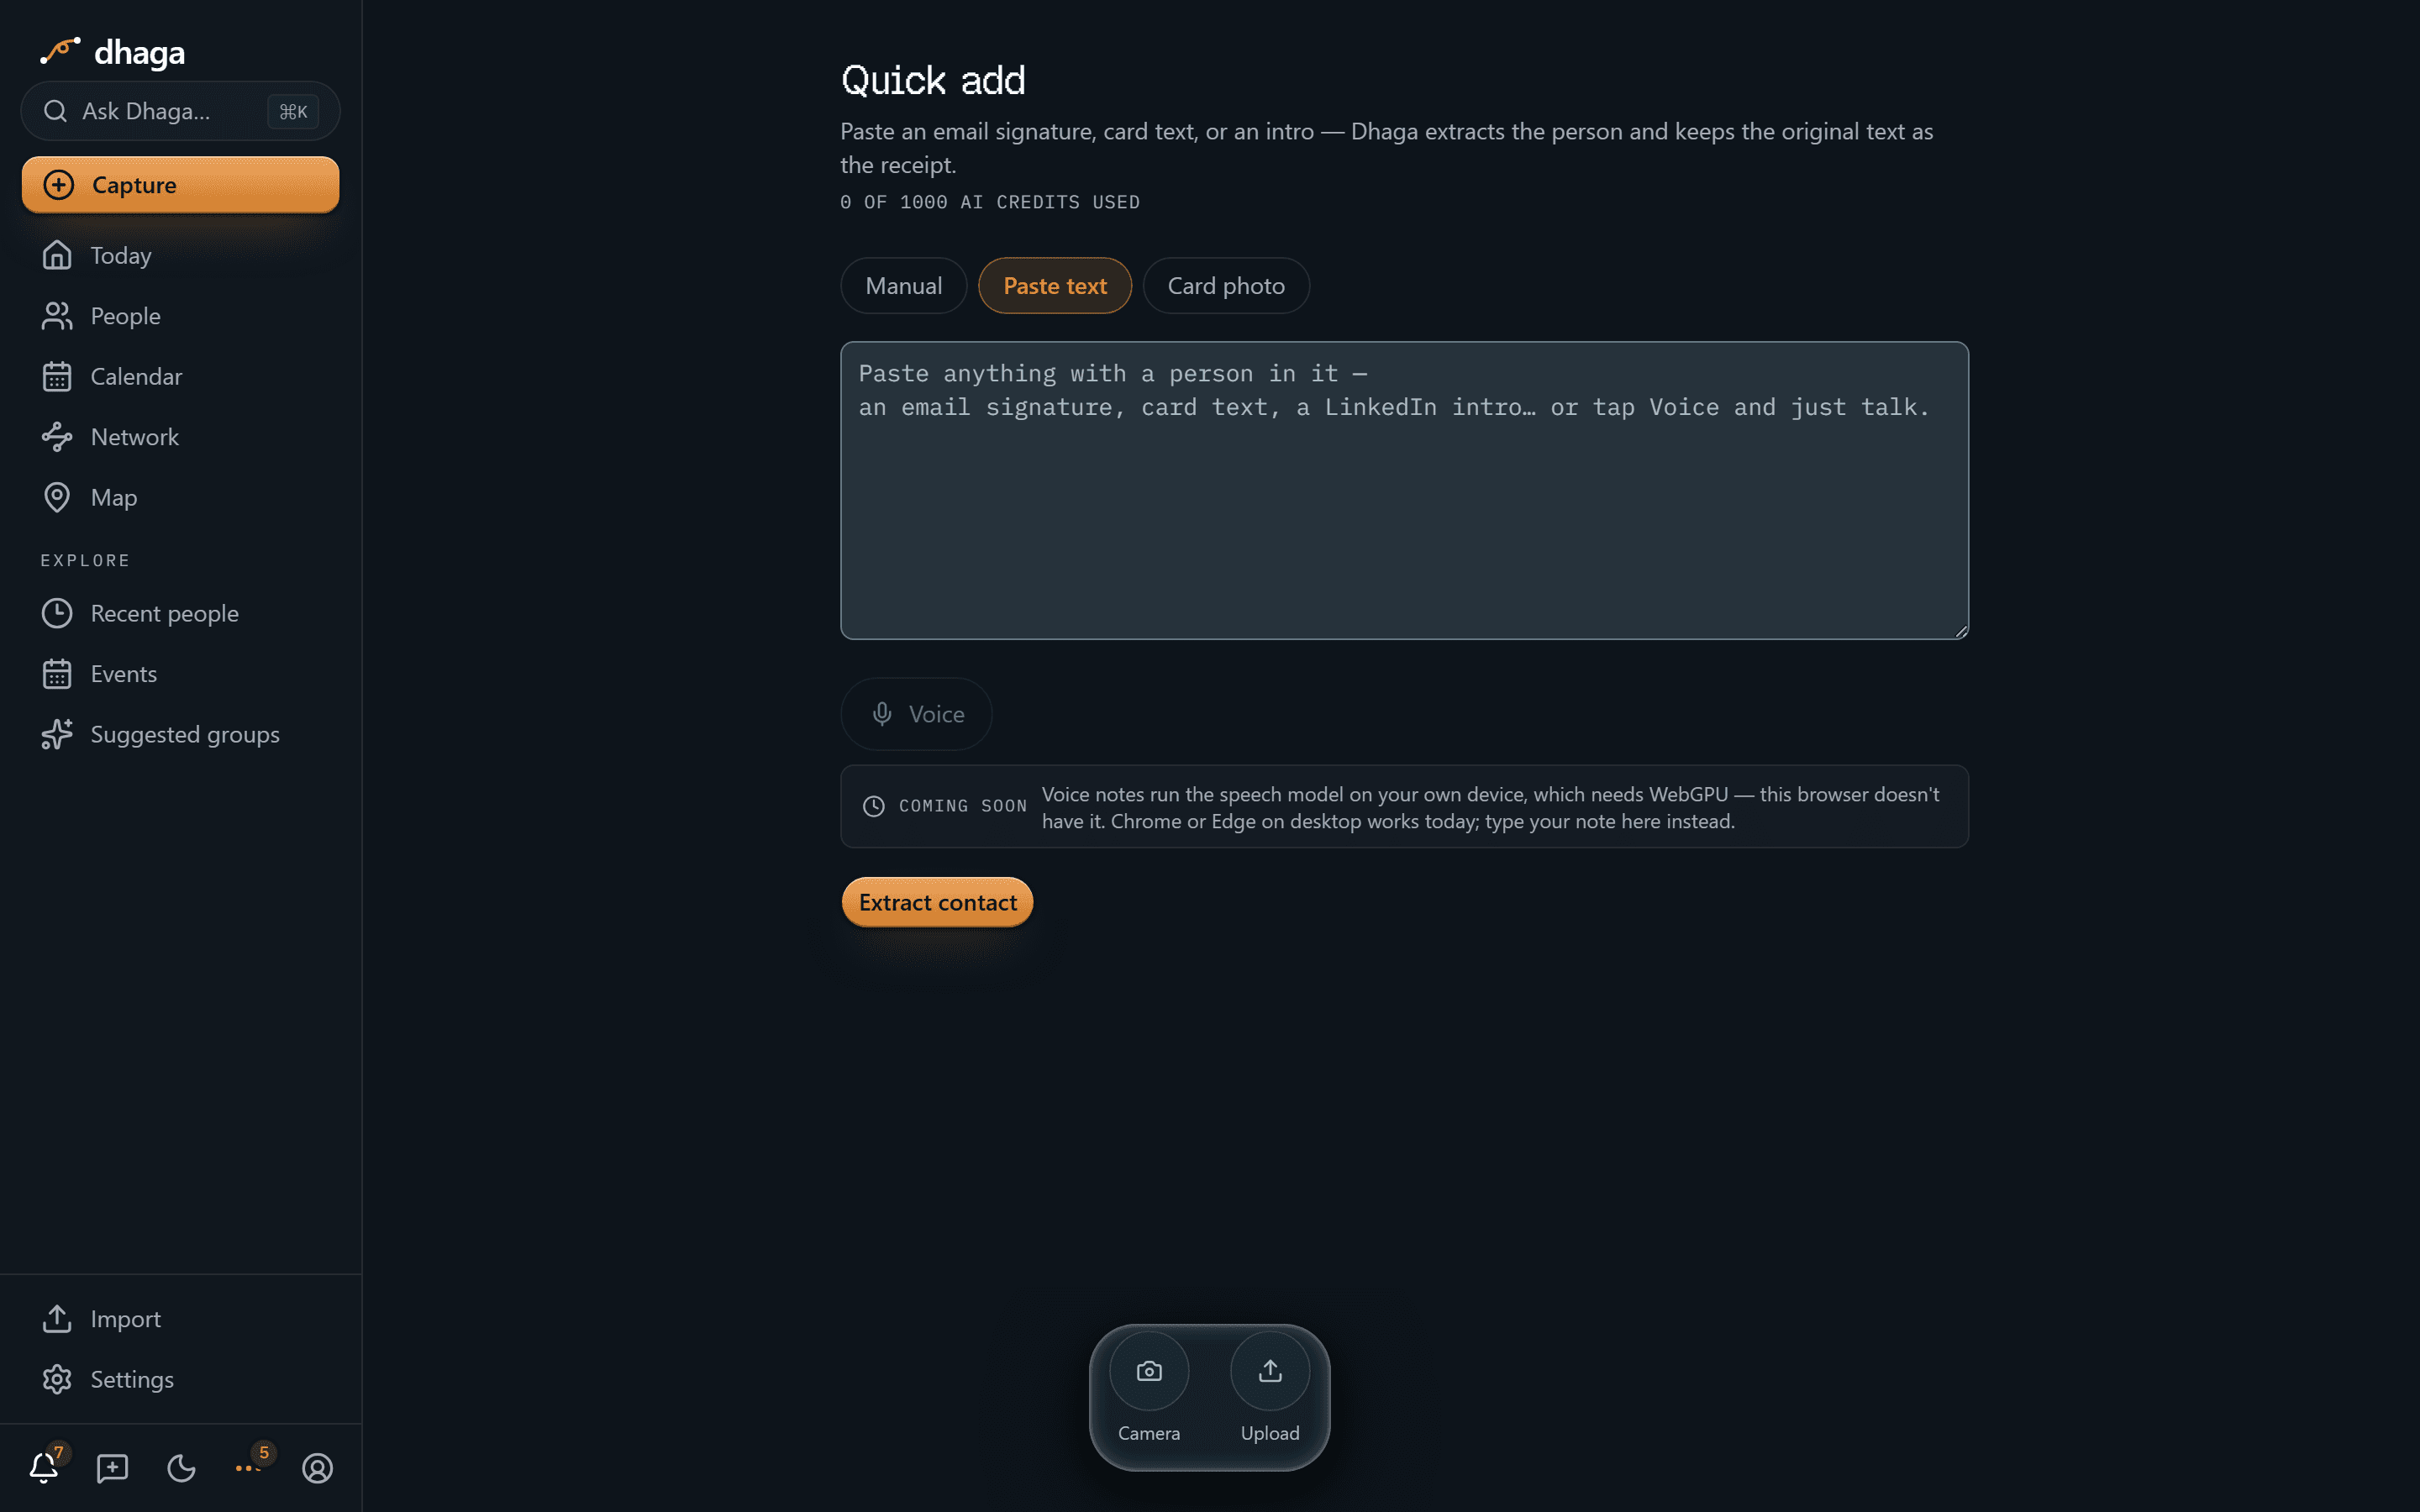
- Paste text — drop in an email signature, the text off a business card, or a LinkedIn intro, and Dhaga pulls out the name, title, company, and contact methods. A Voice mic sits under the box: tap it and describe who you met; the dictation streams live into the text and is extracted the same way. With Dhaga Voice the transcript comes back as tappable word-chips — tap a mis-heard word to fix it, and Dhaga learns that spelling for next time. Record a voice note lands on this same surface — it just names the mic as the reason you came, rather than making you find it under the box.
Where your dictation is transcribed
Dhaga Voice runs one of two engines, and which one you get is a property of the deployment, not of your plan:
- On our server. Where the deployment has speech-to-text configured, you record, stop, and the clip is uploaded and transcribed by our provider — so the audio does leave your device, the same way a card scan's photo does. This engine needs no WebGPU, which is what makes dictation work on iOS Safari and every other browser. It costs one AI credit per clip, there is no live word-by-word transcript (the text arrives when you stop), and a single recording is capped at about two minutes.
- On your own device. Otherwise the speech model runs in the browser and the audio never leaves your machine, streaming words as you talk. That engine needs WebGPU — available today in desktop Chrome and Edge — and it costs no credits.
Where neither can run — no server transcription and no WebGPU — Dhaga says so up front: the mic is greyed out with a "Coming soon" note explaining why, so you never tap a button that can't work, and the same check greys out Record a voice note in the method chooser. It's a live capability check, not a browser blocklist. Typing and manual entry are always available.
-
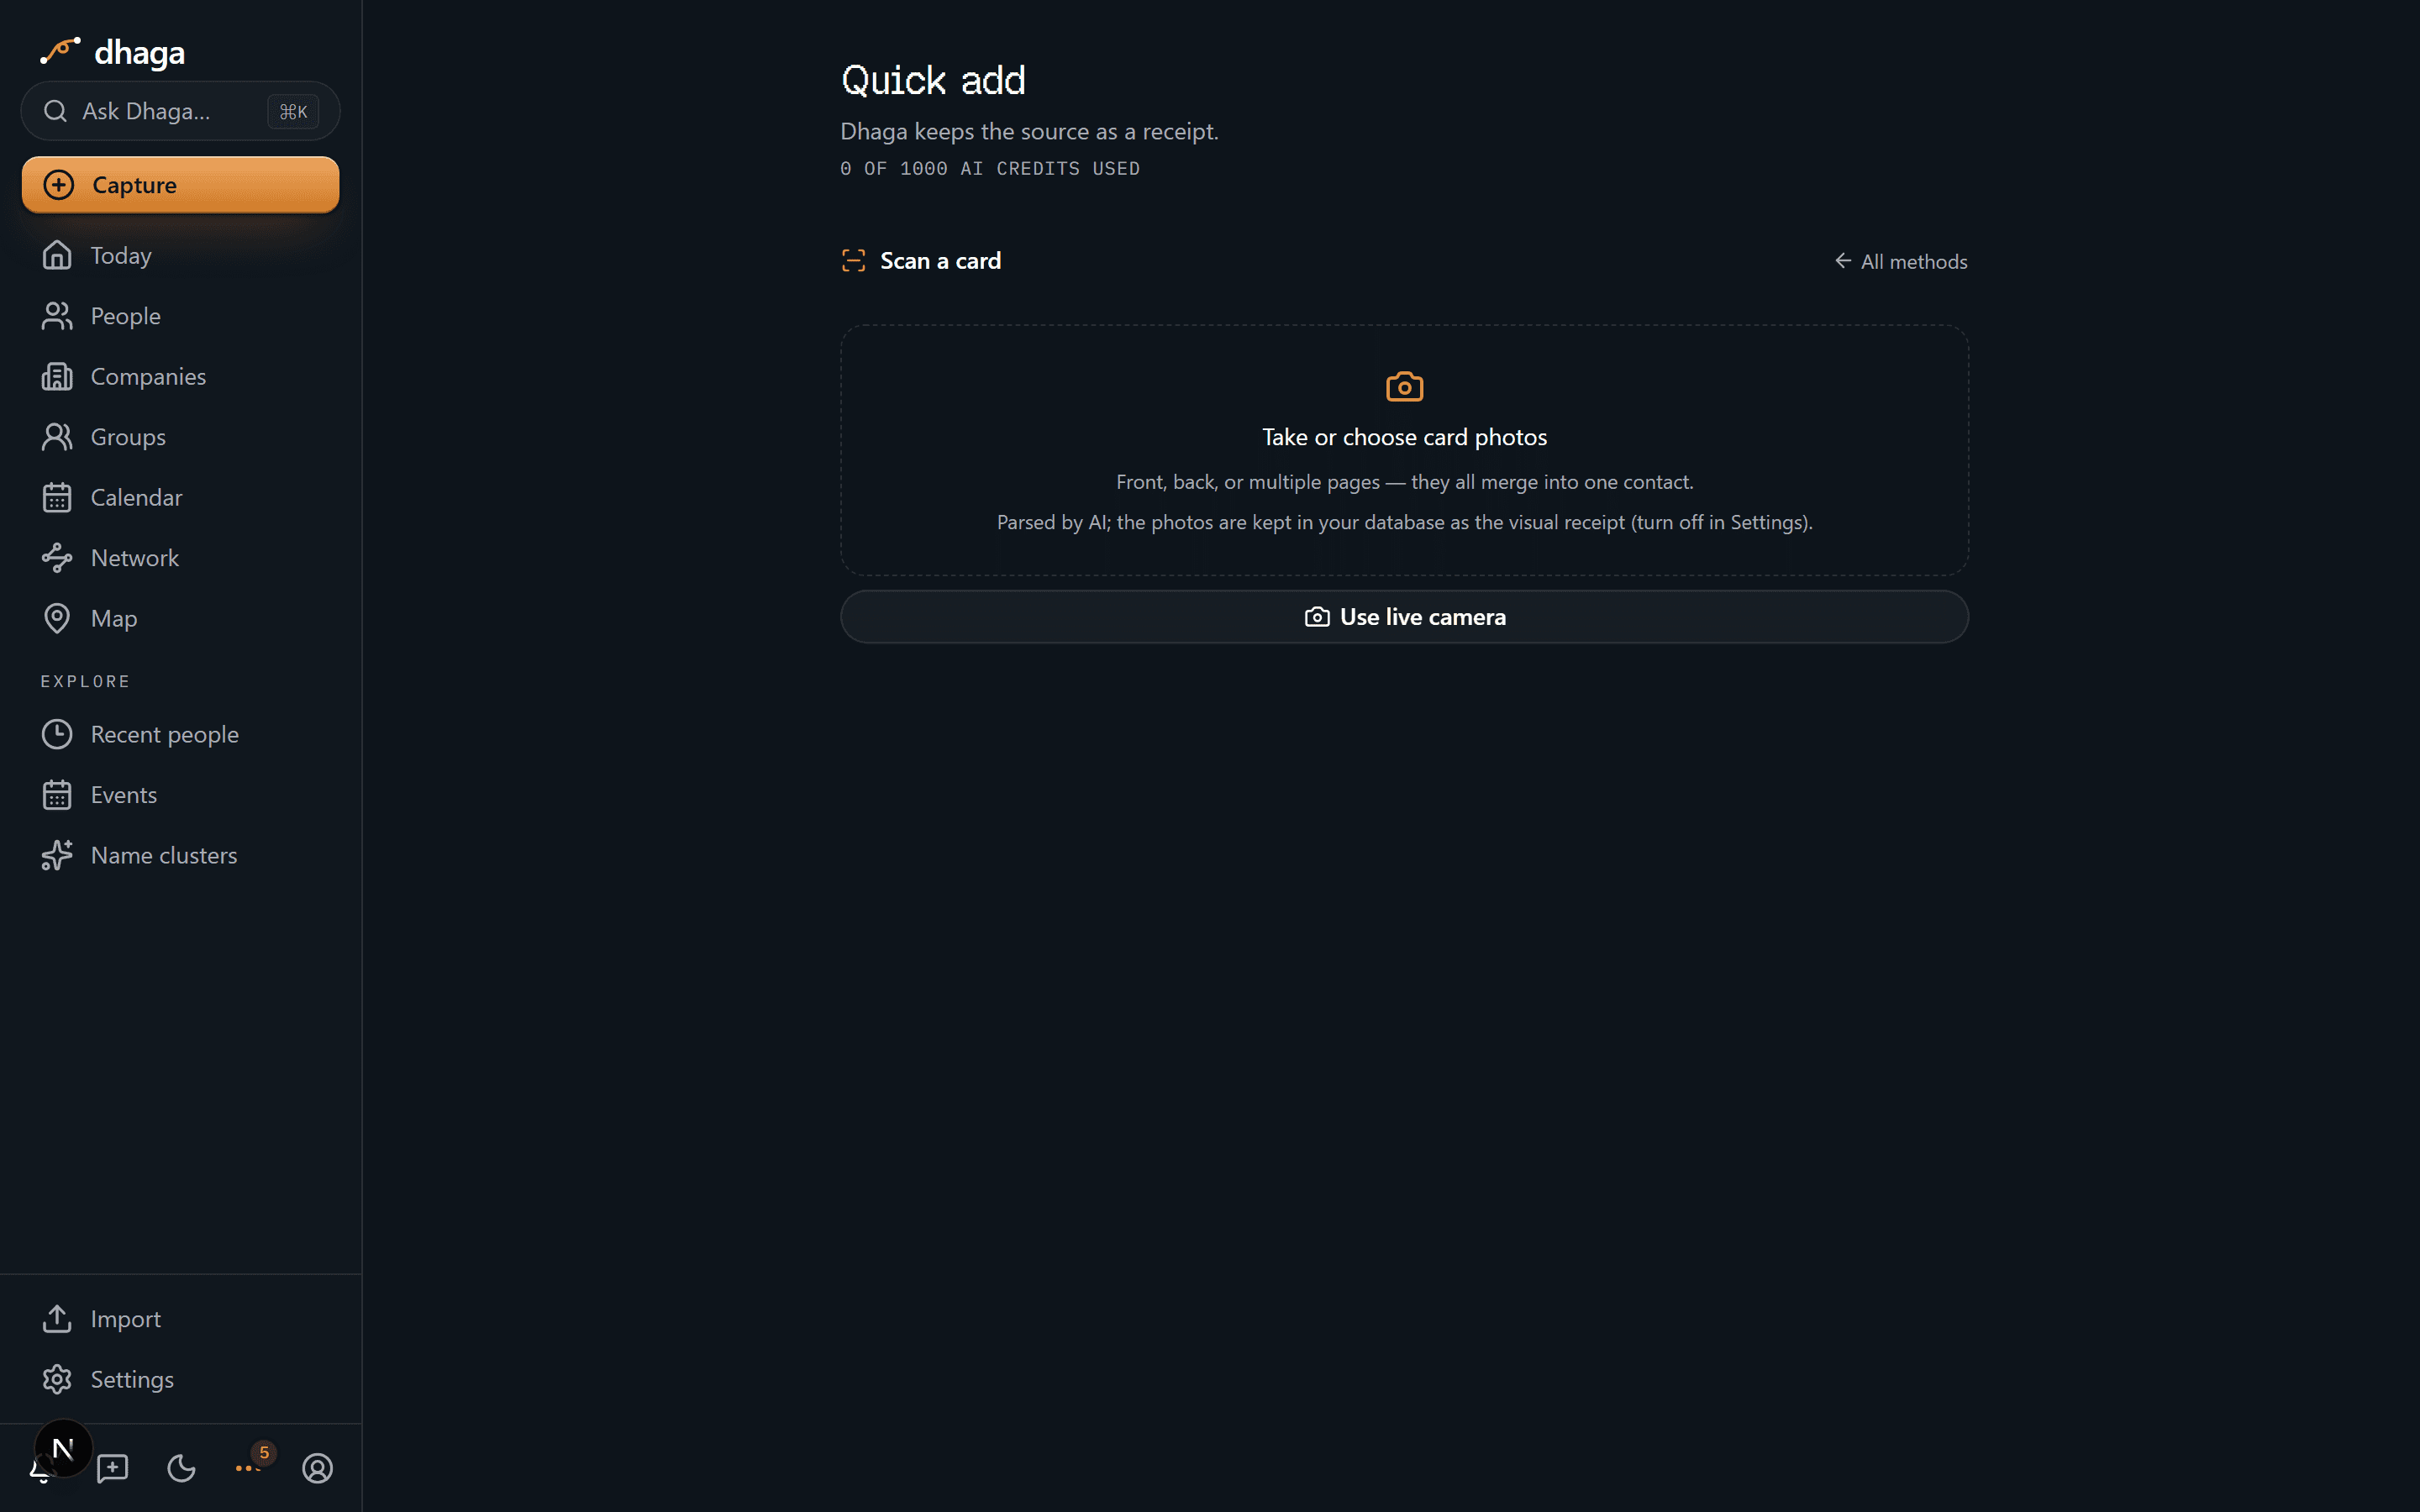
Scan a card and Upload a photo — take or upload a photo of a business card. Dhaga runs OCR and also reads a LinkedIn QR code if one is on the card. You're not limited to one shot: add several photos of the same card or leaflet — front and back, or multiple pages — in a tray where you can reorder, crop, or remove any of them before scanning. On desktop you can also shoot straight from a live webcam, capturing multiple frames in one sitting. Every image you add merges into a single contact, and each photo is kept as its own source receipt. Where a card marks a number or address — Mobile, Direct, Office, a branch name — that marking is carried into the contact's phone and email labels, so you don't have to retype which is which.
The two differ only in where they start you: Scan a card opens the live camera straight away (a card is in front of you now), and Upload a photo opens your photo library. Either way you land in the same tray, and Use live camera on the drop area switches to the webcam at any point.
AI extraction needs a key
The card scan, voice, and text extraction run through Claude. On a self-hosted enterprise deployment whose AI provider hasn't been configured, capture falls back to simpler heuristic parsing. See Self-hosting.
Prefer your phone?
You can also forward a contact card, note, or photo straight to Dhaga on WhatsApp or Telegram — no app to install. See Messaging capture.
Review, disambiguate, and save
Extraction never saves silently. A review dialog shows the fields it pulled so you can correct them before the person lands in your graph:
- Check the name, title, company, emails, phones, and links.
- If the details look like someone you already have, Dhaga flags the match so you can merge into the existing contact instead of creating a duplicate.
- Optionally attach the person to an event right from the review dialog — handy when you're clearing a stack of cards from one conference. See Groups & events.
- Save.
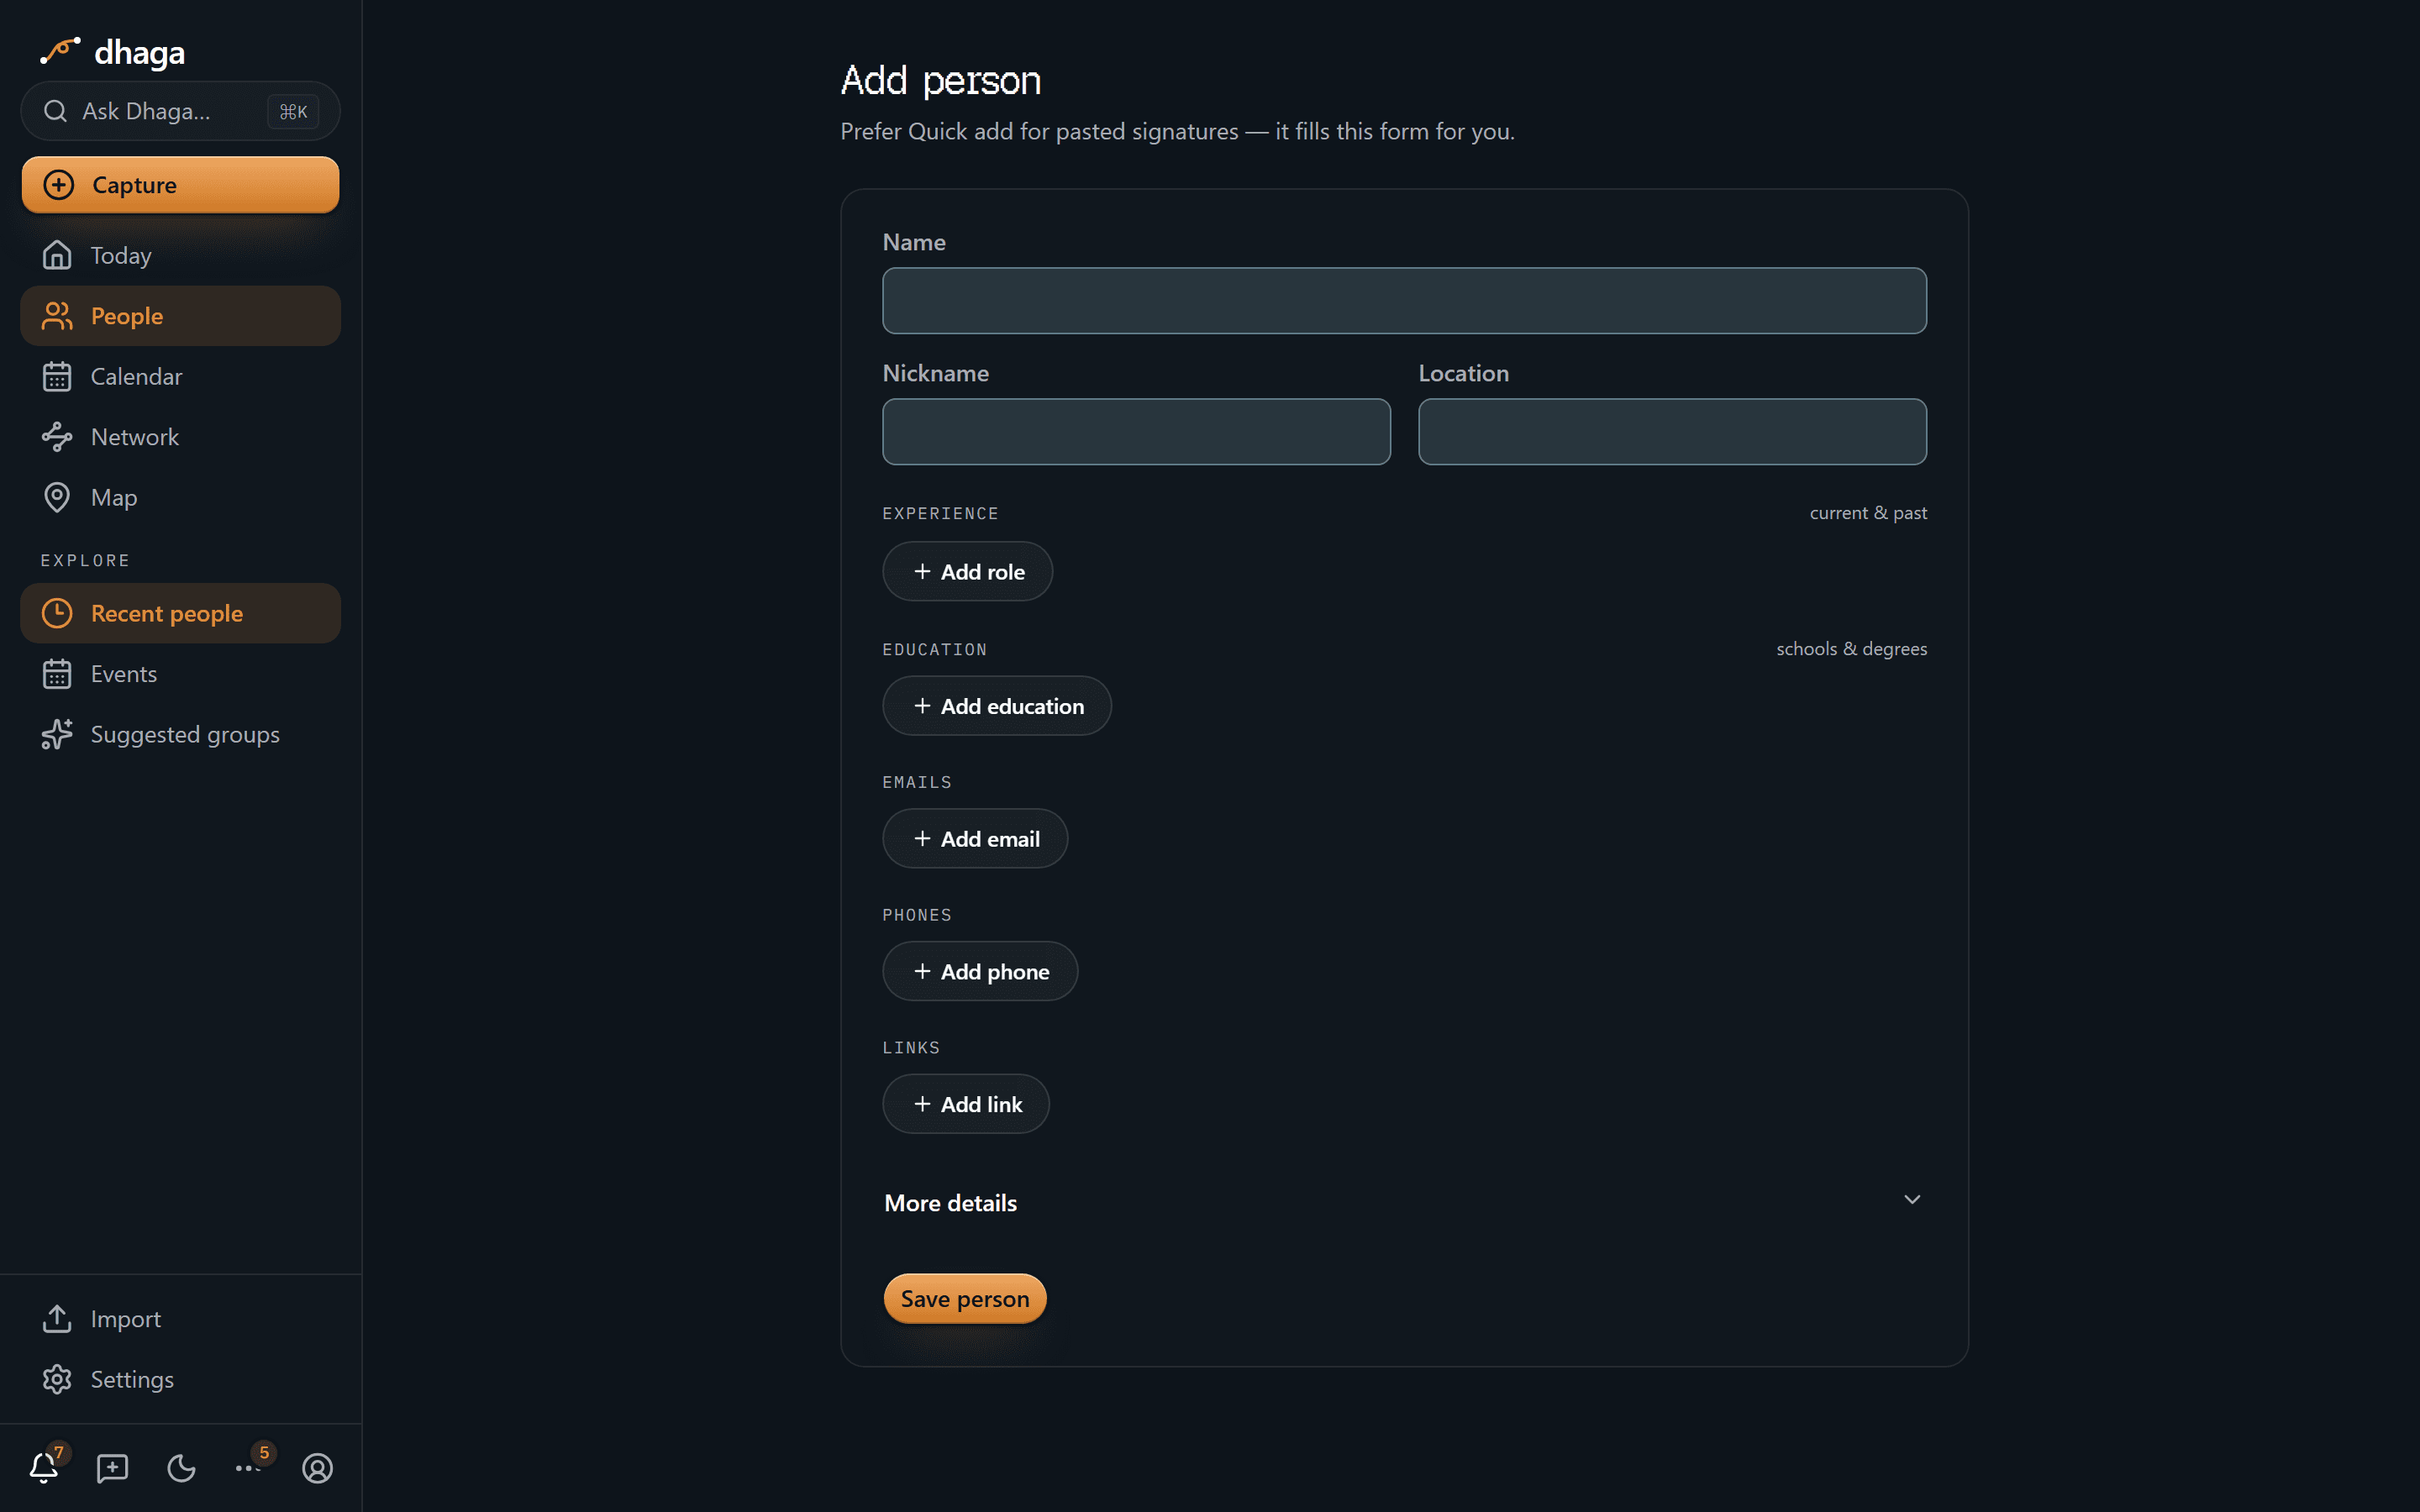
Adding someone manually
Three of the seven methods use no AI and no API key at all: Add a person
types someone in by hand, Log a relationship records how two people you
already have know each other, and Note a fact or follow-up logs something to
remember or something to do against a contact. They used to be sub-tabs nested
inside a Manual mode; they're three rows in the same list as everything else now.
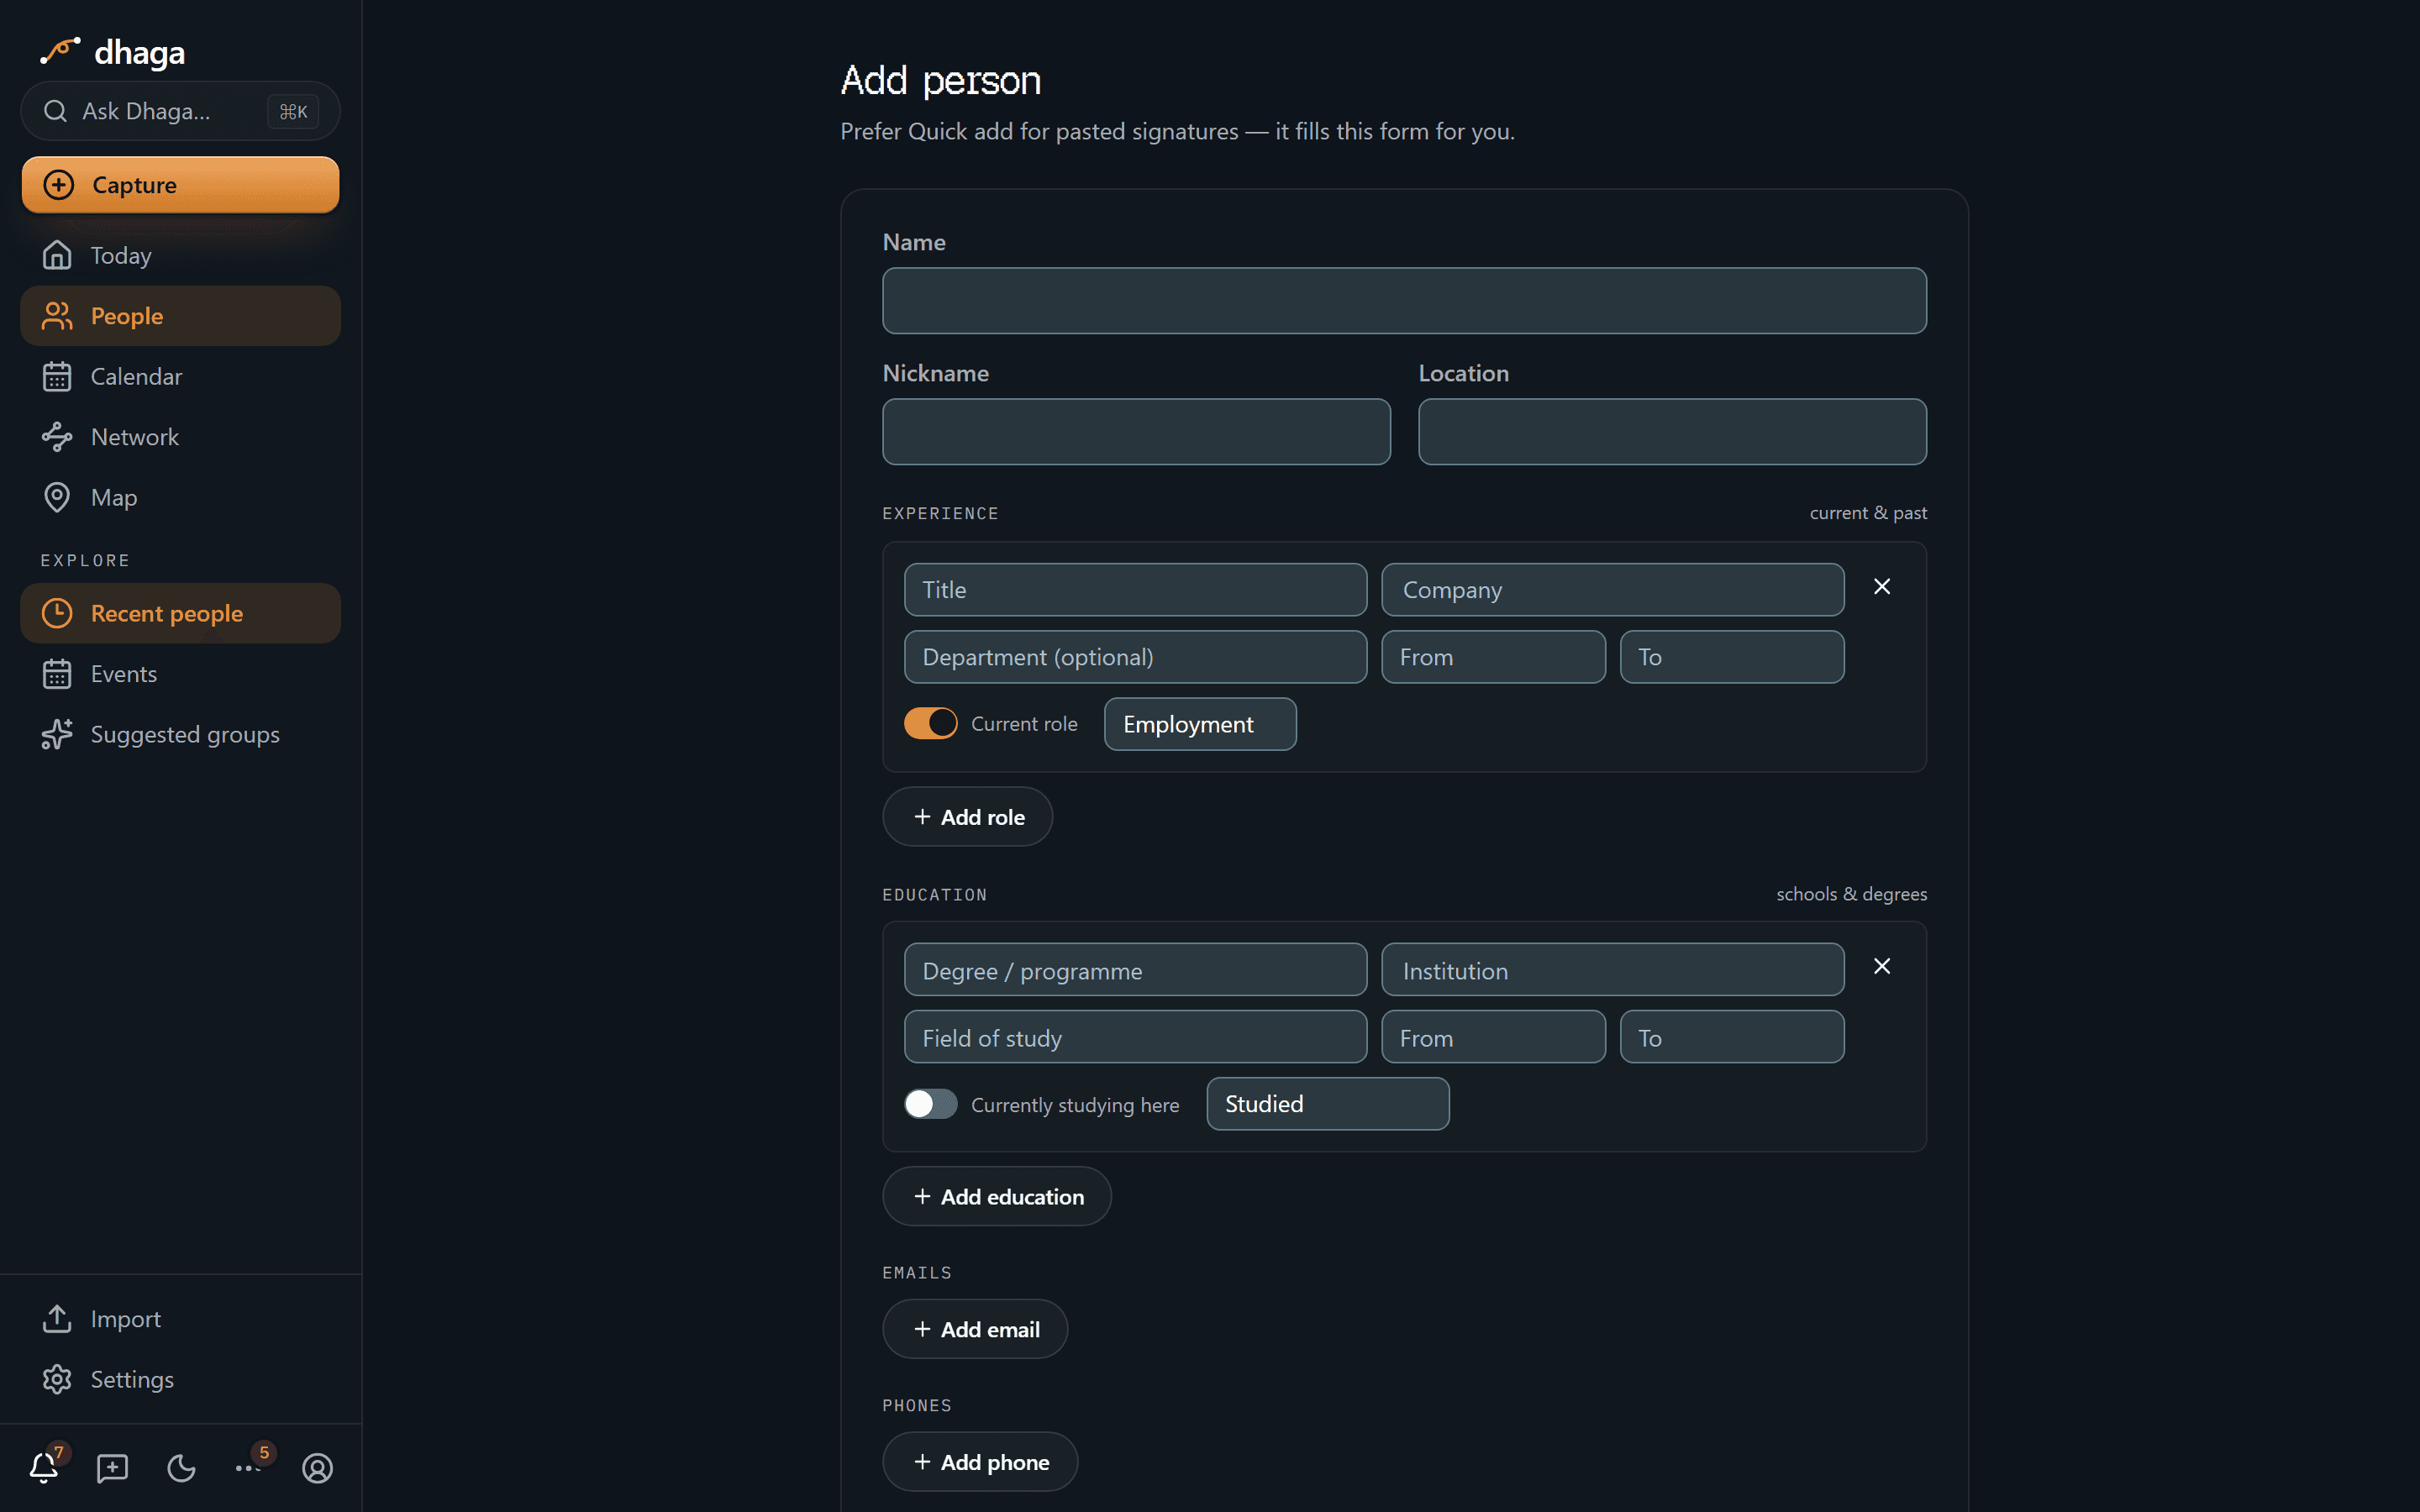
For the full person form with every field, go straight to
/app/people/new.
The person form keeps Experience and Education as two separate sections:
- Experience — roles with a title, company, dates, and a relationship type (employment, internship, founder, board member, advisor, volunteer).
- Education — schooling with an institution, degree / programme, field of study, years, and a currently studying toggle. Education is stored as a "studied at" affiliation, so schools become nodes in your graph just like employers.
Add as many of each as you need, along with several labelled emails and phones and links, then save.
Using Dhaga
A task-oriented tour of the Dhaga app — capture people anywhere, turn notes into a private knowledge graph, and query it in plain language.
Messaging capture (WhatsApp & Telegram)
Forward a contact card, a note, or a photo to Dhaga's WhatsApp or Telegram bot, reply DONE, and Dhaga saves the person into your graph — capture from your phone with nothing to install.